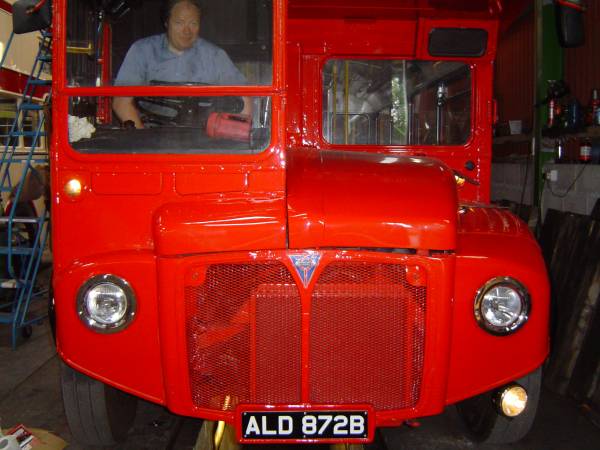
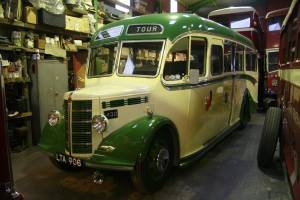
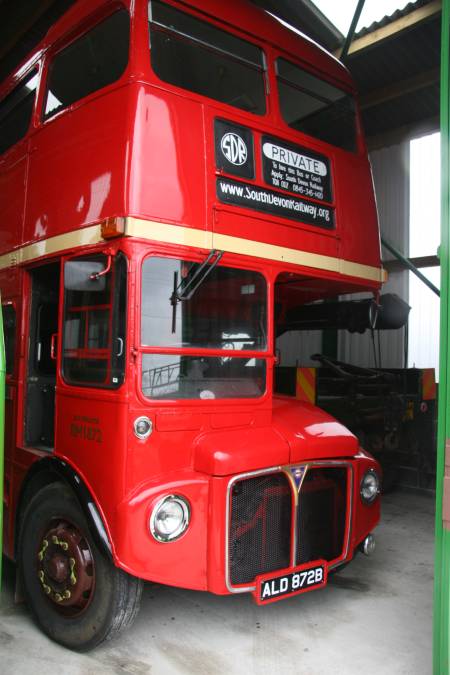
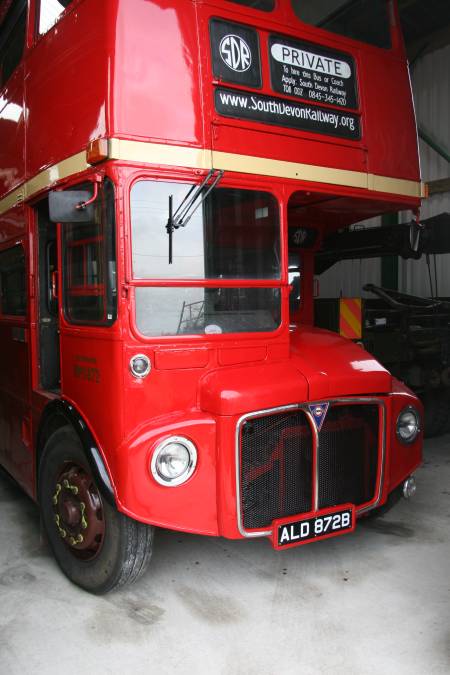
The Restoration of RM1872
 |
|
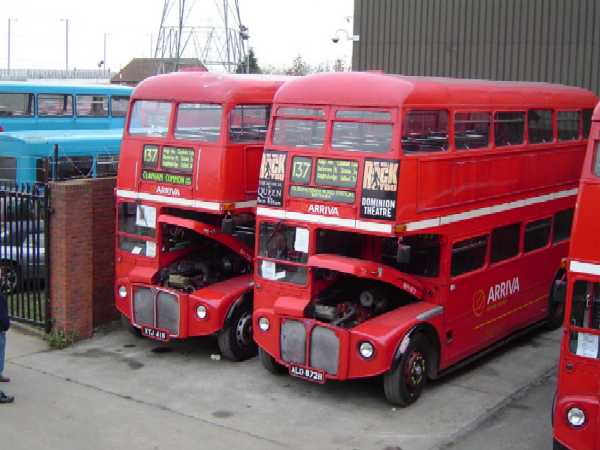
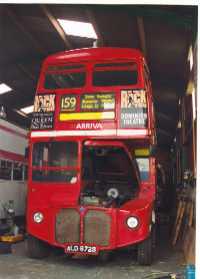
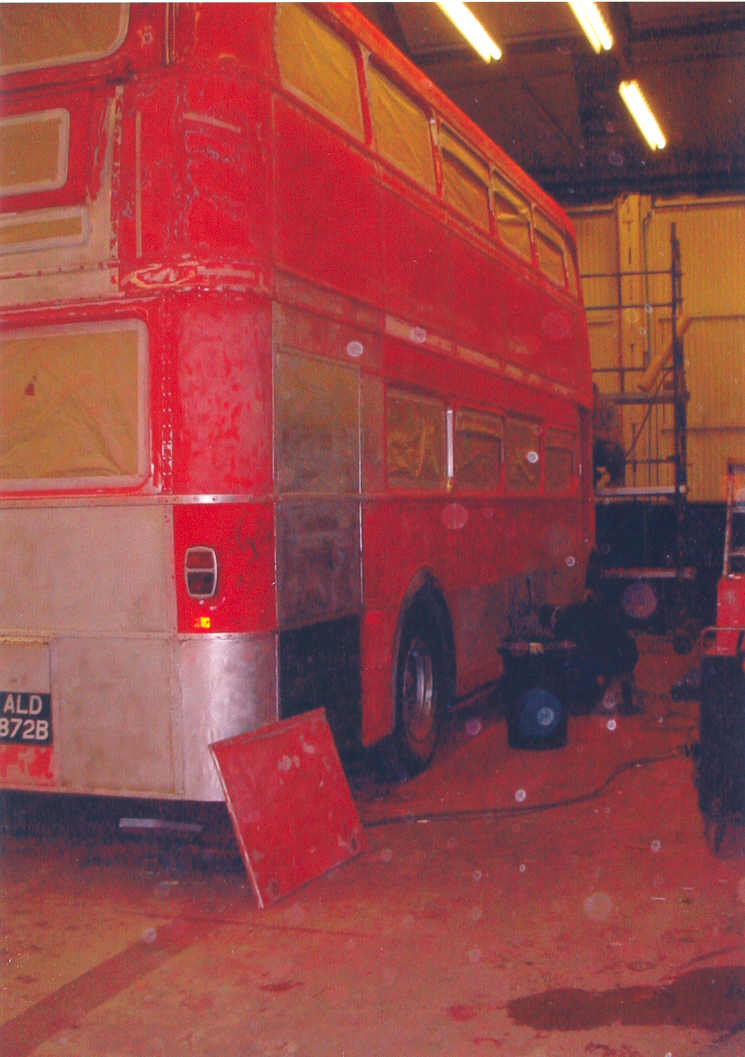
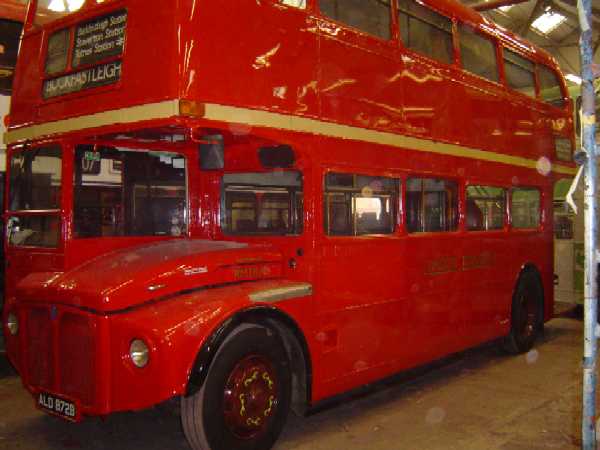
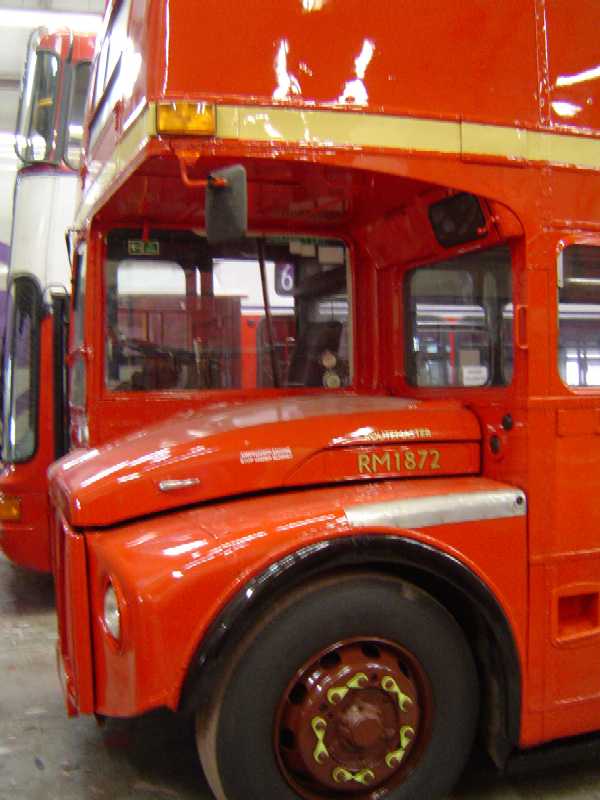
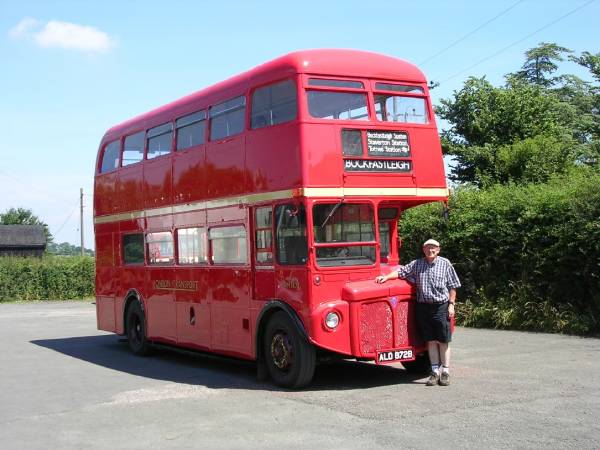
Our first sighting of RM 1872, December 5th 2004 at Ensign's Depot
in Purfleet.
Little did we know that she would soon be ours. |
 |
 |
 |
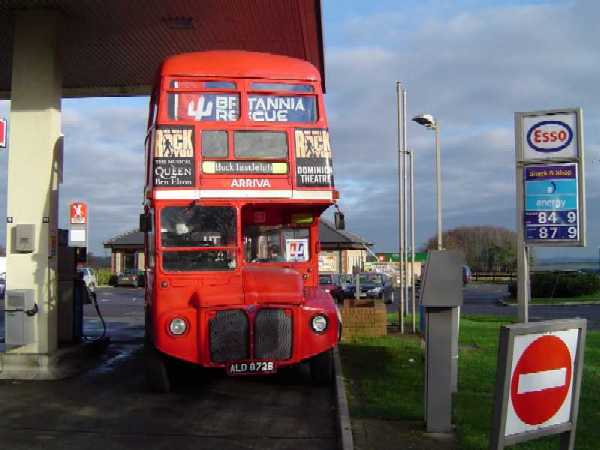
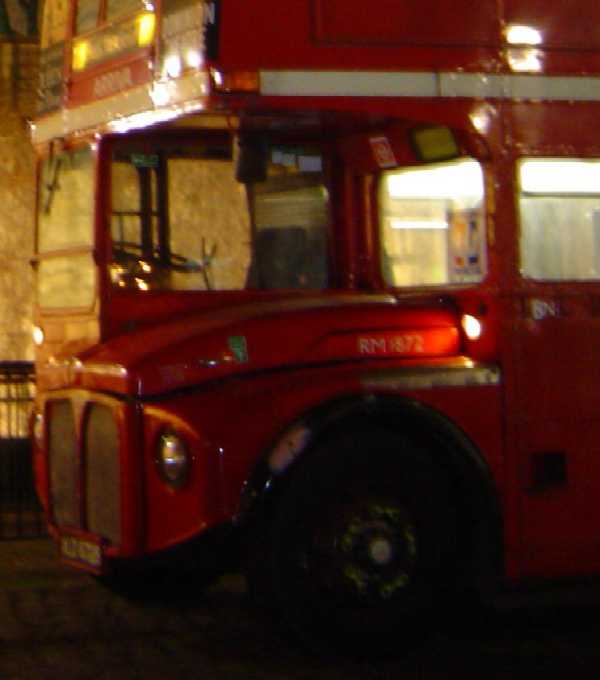
| Overnight at Tower of London | Half way to Devon | Safe arrival at Buckfastleigh |
 |
| On the M5; Read the full story of her acquisition and journey to Devon Click here |
> |
 |
|
|
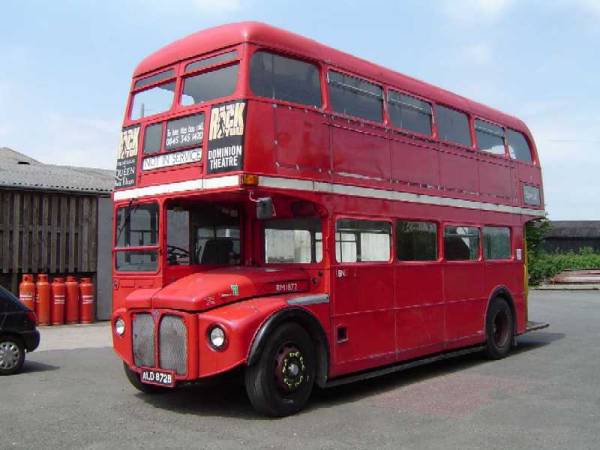
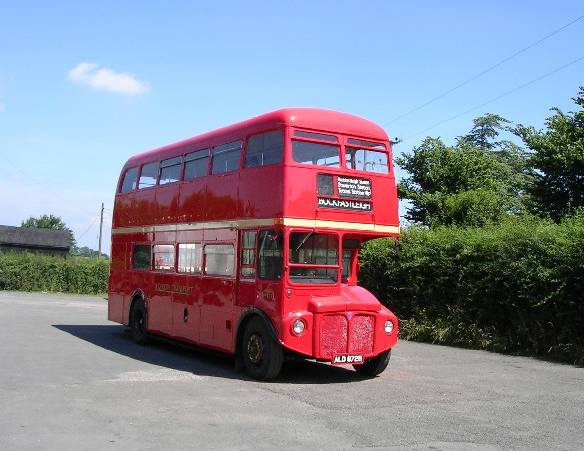
Jan/Mar05 Ipplepen
MOT Preparation |
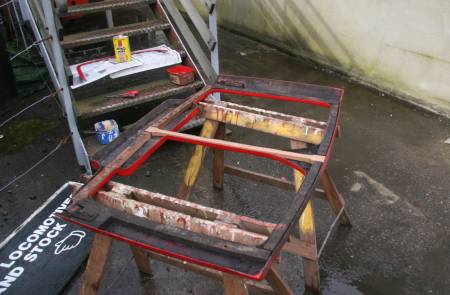
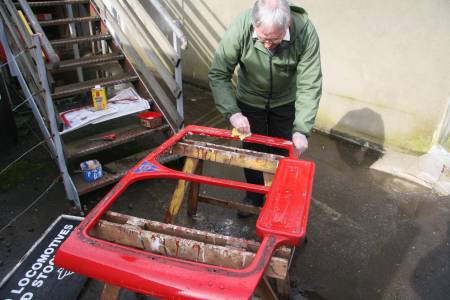
April/May 05 Buckfastleigh SDR
Workshops Crossmember Repair |
June 05 MOT Class VI Pass New Blinds Fitted |
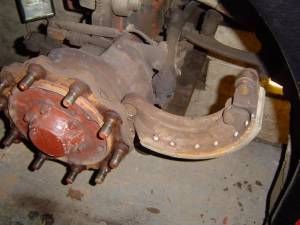
Article on Routemaster Brakes - Click
here
Article on Crossmember Repair -
Click here
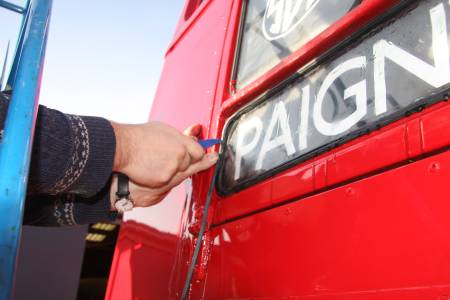
Early July 2005.
|
|||
| The crew from Hampshire Body and Paint just before RM1872 left them | |||
 |
 |
 |
 |
| More new panels | Regeneration... | It's easy with the right tools.......... | |
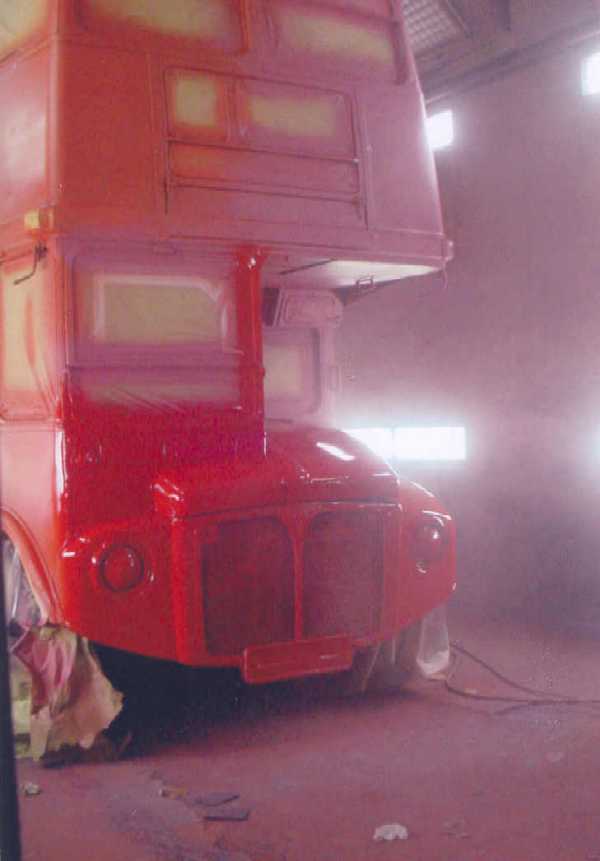
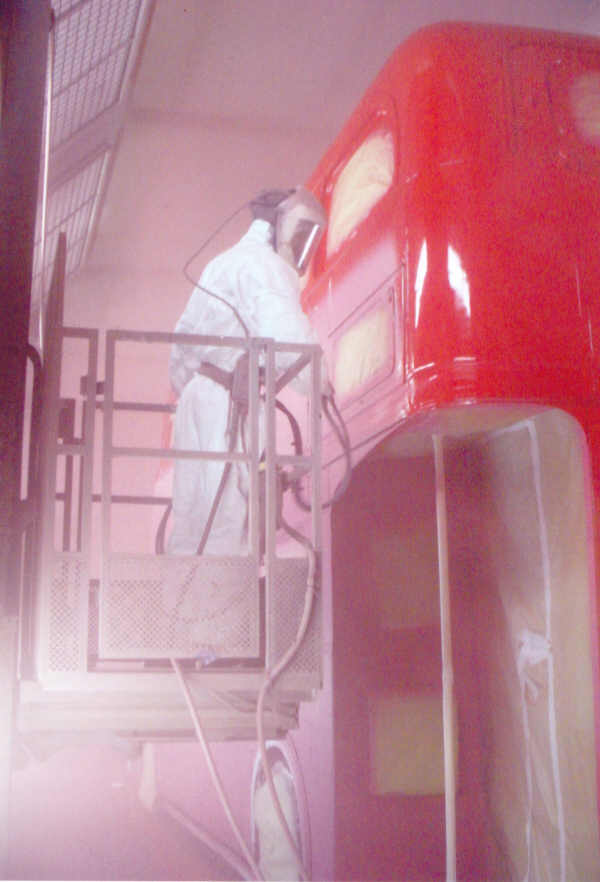
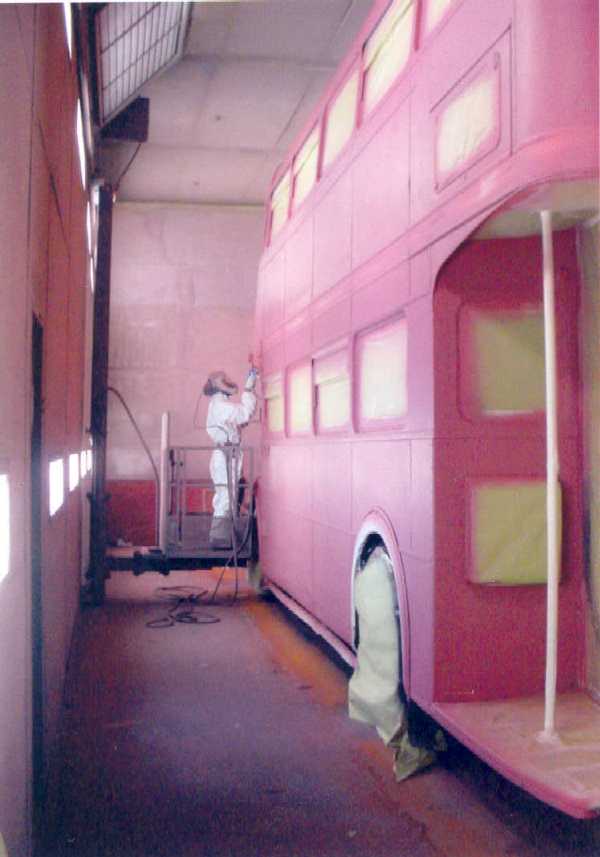
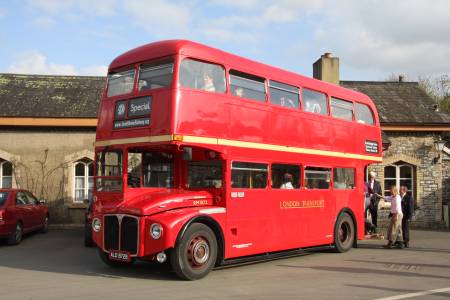
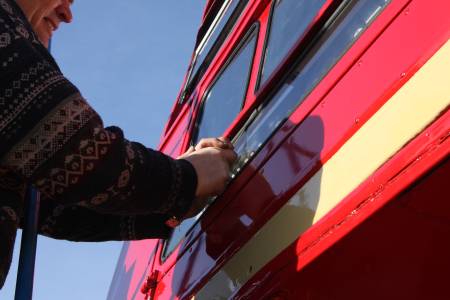
RM 1872 has been repainted into LT Livery by Hampshire Body and Paint (Eastleigh) 023 80644200 ask for Jack Parsons; take a look at the pictures below and compare them with those above to see what a brilliant job they've done.
 |
 |
 |
| Says it all...... | No doubt who She is | A much neater ¾ view |
 |
 |
 |
| A bright start | Compare now.... | ....with then. What a difference. |
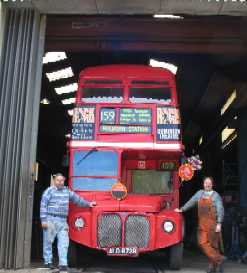
13th July 2005.
| One of Ron Greet's drivers, Willy Beaton,
took RM1872 to Eastleigh and today brought her back.
An observation is that she completed the round trip on a single tank of fuel and still has some left! |
||
|
|
|
| RM1872 tidy but tired paint work | Freshly back from Eastliegh | Our driver stands proud |
Replacement headlamp bezels have been sourced and were brilliantly chrome plated by Kent Metal Finishers Limited (who have since ceased trading. Recent work has been done by Medway Buffers and Chrome. Please mention us when contacting them).

|
| Just look at the difference |
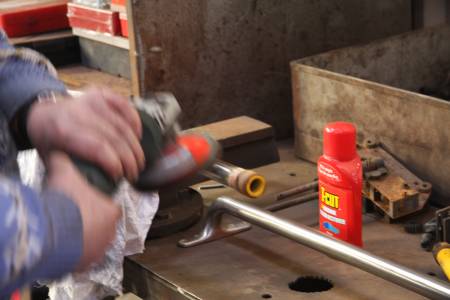
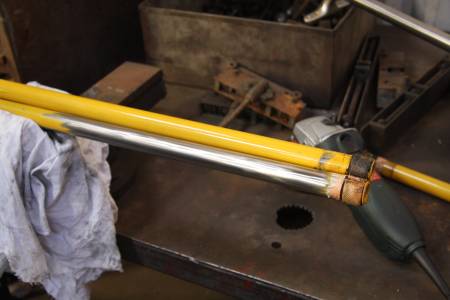
Our next job has been the fitting of a tachograph which ran into a little problem; the speedo drive had no play in it and only turned when it felt like it which is quite unsuitable for the tachograph! The problem was found to be a lack of teeth on the speedo drive. When the gearbox was changed a year ago the speedo drive was refitted as a friction drive item which was fine for the stop-go traffic in London where 20mph is good going but no good for rural Devon where we can achieve top speed on the better roads. A replacement shaft has been supplied by London Omnibus Engineering Services (Tel 01737 552276).
Photographs of the installation will be posted when we've taken some; the fitting was rather traumatic and we didn't have time to take any.
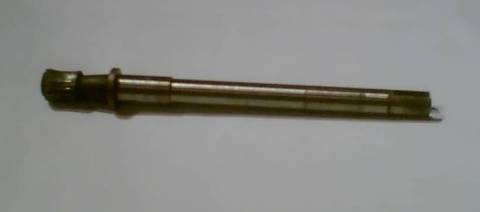 |
| Worn out speed drive - note gear on left is concave not parallel with 14 teeth |
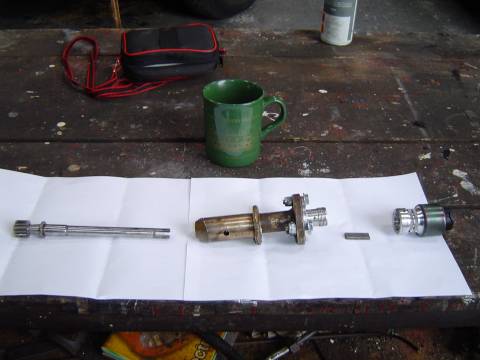 |
| New Speedo Drive laid out so all components are visible. Note bolt on adapter |
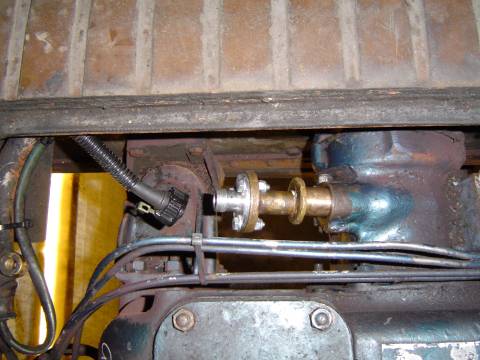 |
| Where the tacho generator goes (speedo drive assembly not yet fitted) |
Here are the missing pictures of the Tachograph installation. We modified the existing dash panel which will upset the purists (but it already had a hazard warning switch....). Given the bolt together nature of the RM it is totally feasible to replace the speedo dash box with a new tacho box; it's just that we didn't have the time or see the need given that RM1872 isn't original any longer. We did reuse the speedo wiring to provide the ignition (engine running) supply, picked up a 24 volt battery supply from the horn fuse and joined the speedo illumination feed to the tacho illumination wires. The tacho sender wiring was routed along the battery supply conduits under the 'bus and up into the old regulator box. From here it was in convoluted conduit around the cab and into the dash following an existing cable route. If you don't want to reset the clock in the tacho (A.M. at the top) then a non isolated supply can be run along the same route. We have one but haven't found where it goes; probably to the non-existent radio.
 |
| New Dash panel awaiting a repaint in matt black. |
1) the brakes made a knocking sound
2) the engine wouldn't stop running when turned off!
Once we'd done this all was well and we could go for a run.
16th / 26th August 2005
When RM1872 was MOT Tested it was remarked how clean the exhaust was and we have since noticed on the DVLA web site that we could be eligible for the "Reduced Emission" Vehicle Excise Duty (currently £165 against £500 for a non compliant vehicle) in which case she will be taxed for 12 months which will mean she'll be available throughout our operating season and beyond which is an unexpected bonus.
We are currently pursuing the "Reduced Pollution Certificate" (RPC) which is issued by VOSA though it looks like we should have applied for it at the time of the MOT since the way the emissions are tested varies dependent on the standard they're being tested to. The Scania (DC901|902|903) engines were Euro2 compliant at manufacture from 2000 so we're hoping we still are! We're awaiting the booking of the "Reduced Pollution" test so she'll miss the Bank Holiday which is very irritating.
Renewing an existing certificate appears much simpler than getting the first one; for those who are interested in the PCV option the VOSA website has more details and the people at VOSA are very helpful.
10th September 2005
Today the "Certificate of Initial Fitness" arrived in the post from VOSA. The local Vehicle Taxation Office have refused to issue a PCV tax disc without this because the current class is "Historic" (though the previous one was PCV). Now we've got this we'll apply for the RPC and, hopefully, get her on the revenue road in time for the Transport Weekend.
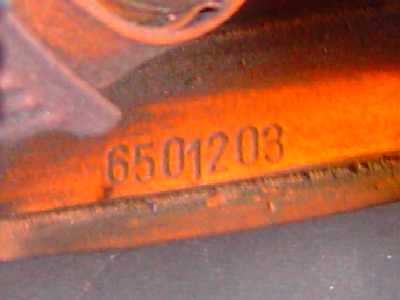
On Wednesday 12th October we 'phoned VOSA Plymouth and booked RM1872 in for her emission test. In order to be accepted we had to complete the inspection form so the inspector could confirm we were eligible. This involved finding the engine number; in the parts book this is clearly on the right hand side which is virtually impossible to see. We used a digital camera to look around the corners which revealed a plate stating the engine wasn't approved for use in the USA but the engine plate was blank! In the end we found the number stamped on the front of the engine on the top of the cylinder block under the water pipe.
We had a brilliant run in glorious sunshine to the old Napoleonic fort in Plymouth though our driver missed the turning and a local 'bus driver kindly shepherded us to the test centre where we handed over three crisp ten pound notes in exchange for three battered one pound coins (current cost of test is £27).
The inspector first confirmed the chassis, engine and fuel pump numbers then he instructed the driver on how the test was to be performed which revealed where our strange whistle, which only occurs out on the road, was coming from; the exhaust tailpipe is a whistle!
The exhaust analyser gave our four samples as 0.38, 0.31, 0.28 and 0.27 m/l. The pass for a Routemaster is less than 1.0m/l. In fact we passed all categories excepted the most stringent, for new vehicles, of 0.2m/l. Once over the pit the inspector checked our exhaust pipe and recorded the Exhaust Conditioner details including serial number.
The hardest part appears to be getting the first test because it has to be done separately to the road worthiness test. The VOSA document INF64 is quite clear; the vehicle has to be legally on the road before it can be tested for the first time however subsequent tests can be done at the same time as the normal MOT.
Having passed the test we went down to the Devon side of the Tamar Bridges for publicity photographs.
Now we're just waiting for our 6 month tax disc to be exchanged for a 12 month one and a refund cheque.
The next outing for RM1872 may be the October half term or the Diesel Gala 05th & 06th November 2005.
 |
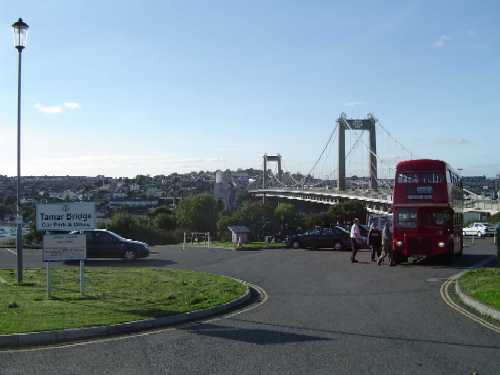 |
| Engine Serial Number located at last. | RM 1872 visits the Tamar Bridges to celebrate. |
Progress report January / February 2006
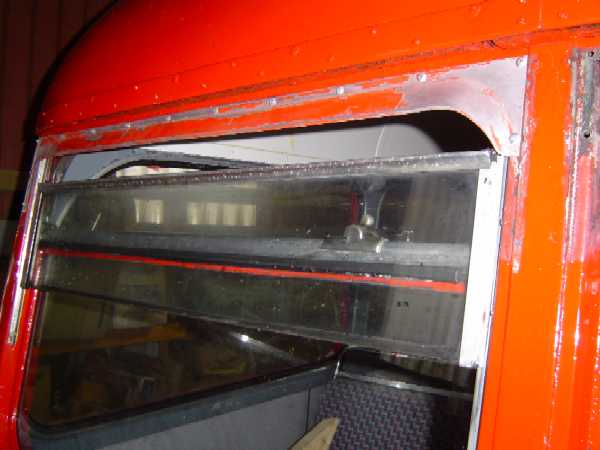
One of the things we wanted to replace were the Hopper Windows fitted to the upper deck front when she was refurbished by Arriva.
We sourced replacement windows together with the winders during 2005 and over our working weekends in Devon during January and February 2006 these were fitted. The screws for the windows runners are stainless steel 1/8", Whitworth cheese head and had to be specially made as they are no longer commercially available. The raised head screws for the inner trims will also be specially made. We're hoping the return to proper Routemaster windows will eliminate some of the leaks!
The amazing thing is all the holes lined up - the beauty of a jig built construction.
Have a look below and compare the last picture with the earlier one in the report half way up.
 |
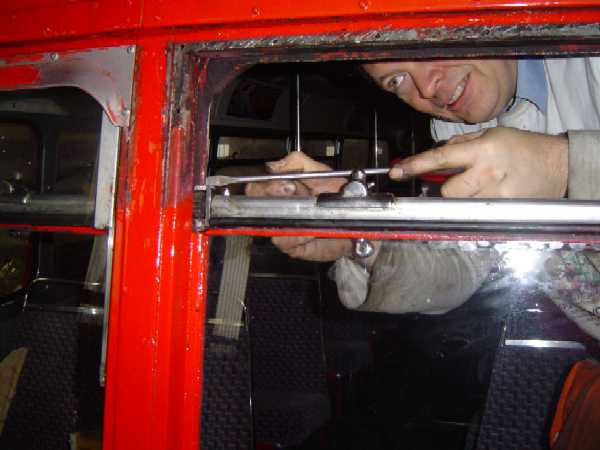 |
| Replacement window fitted to offside front before re-painting (and the bar being swapped over). | (Wrong) winding bar being fitted to the nearside - winding handle should be toward the side of the 'bus. |
 |
 |
| Pete & Gavin fitting the replacement window | Both windows in place and 1st topcoat applied |
Progress report March 2006
A couple of days were spent on RM1872 checking her over for the new season which starts in April; this included replacing the sealing rubbers in two wind down windows (only 7 more to go). We also examined the alarm circuit to find out what'd failed causing the alarm burble away to itself all the time the engine was running! It's a dead resistor which we replaced together with the alarm unit so it's deafening again and the personal attack alarm makes a noise too.
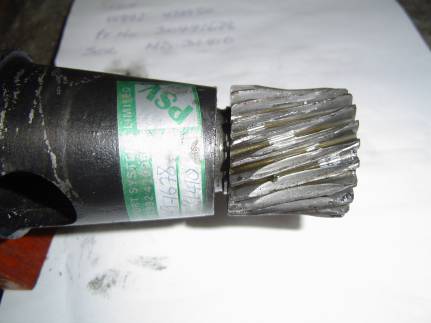
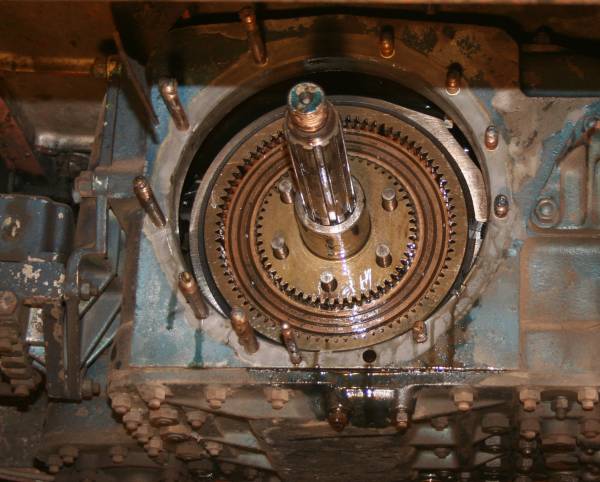
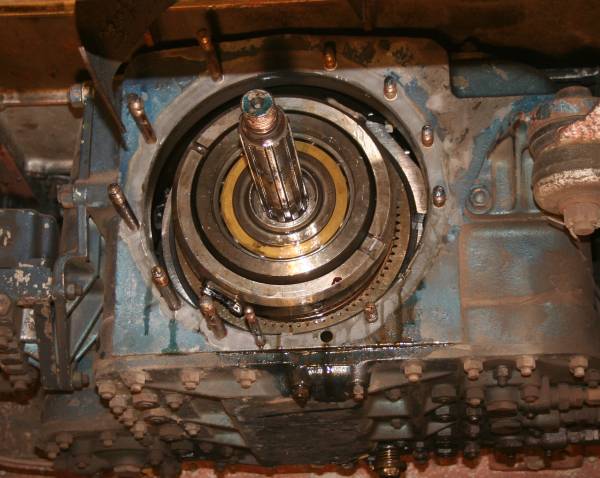
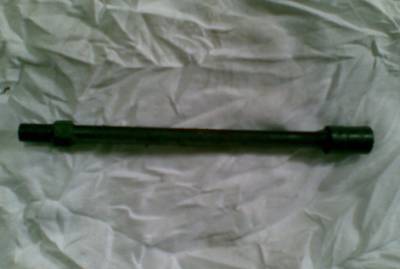
When we brought RM1872 down from London we lost the automatic gear selection and wired this out but never established what the cause was beyond the Speed Generator (SG) not giving a signal. As can be seen from the photographs the SG has worn rather badly and the thin teeth simply failed. We'll be getting a new gear so we can re-instate the automatic (and we'll make a shorting plug to simplify the fix next time).
We also topped up the power steering fluid which, because we've got a Scania, is a separate circuit with filter unit on the engine. Turning corners is a lot easier and the "dead" spot on the steering has gone.
The dashboard was given a new coat of matt black paint so it's looking a lot smarter too. The rest of the cab will be painted in due course.
 |
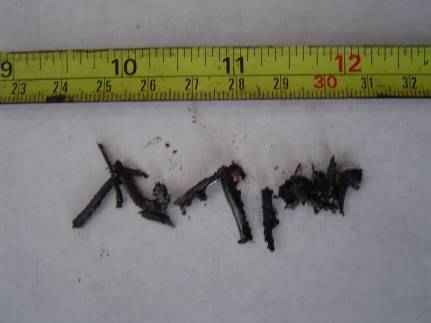 |
| The worn out Speed Generator | The Missing Teeth found in the Gearbox Extension Housing |
Progress report July 2006
The speed generator now has a new gearwheel and is producing a proportional output so we can re-instate the automatic gears. We're looking at a way to provide manual and automatic without the need to take apart the head panel. More on this will be published later.
We've managed to source the correct fog lamp and mounting bracket. We had fitted the bracket for the fog lamp but it was the high version for the fog lamp in the wing cut-out. Since we don't have that type of wing nacelle we needed the lower type which we managed to acquire. The wiring is all new and uses modern thin wall of the correct colour and trace because the original wiring had been removed. The wire from the switch was present but we don't know where it's been cut off so we ran all new including the headlamp. Weatherproof AMP "Econseal" connectors have been used at the wing to replace the original LT connector because RM1872 doesn't have the RM plug.
We sourced a new switch through Arriva (it's made by Eaton, USA) and, because we don't have the original RM fuse we used a modern LittleFuse which fits quite well! The fit isn't good enough for higher currents but this is under 3 amps.
We also changed the accumulators (see article) and tried to repair the power steering (see feature).
|
|
| "New" fog lamp works! The angle is as it was on the donor wing. | |
|
|
| New fog lamp wiring (note LittleFuse blade fuse) | All buttoned up with correct switches |
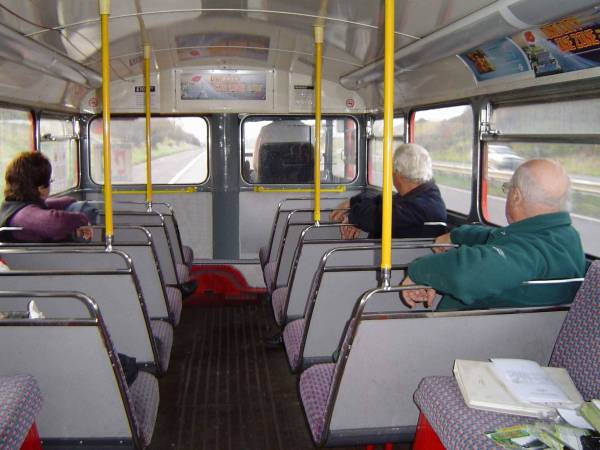
Following a good season which was fairly trouble free (windscreen wiper came loose one rainy day) we have continued with the restoration of RM1872. This has been the total replacement of the seat cushions with newly upholstered units which now presents a very tidy interior and we've replaced the entire set of upper window glass to remove the tagging. See article.
We've also made a start on re-instating the illuminated advertising sign on the lower deck. This now whistles a treat but needs the perspex panel and fluorescent tube. These will be fitted in January 2007 along with the replacement of a noisy gearbox bearing.
Progress report January 2007
The fluorescent tube has been re-instated in the internal illuminated advert and it lights up! The replacement perspex has been ordered and will be installed in March. We also added "bottom end inserts" to the blinds from McKenna Brothers and installed the new number only blinds at the front. This now gives us a full set of black and white blinds with more useful displays including the web site address for when she's not on a designated route.
We also changed the sidelight bezels to a pair we've had rechromed by Medway Buffers and Chrome.
 |
| Note the more correct "Private" notice. |
 |
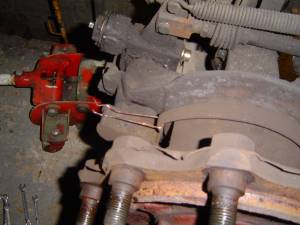 |
| Front shoe laid back for removal | Without special tool wire is used to release spring |
 |
 |
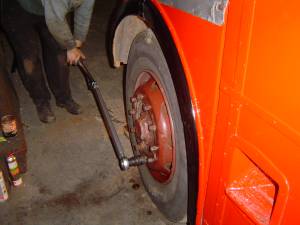
| Torquing up wheel nuts (note left hand thread) | One of RM1872's "new" stable mates |
 < <
|
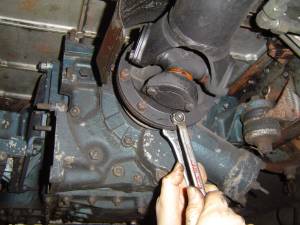
 |
| Undoing the prop shaft (after marking flange) | Restraining the flange to undo input nut |
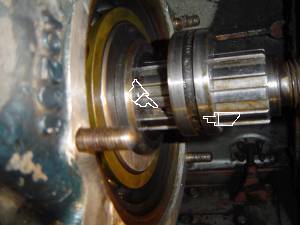
|
 |
| Aligning oil pump output to shaft (holes indicated) | Ready for pump, cover, pulley etc. |
Due to the weather, other vehicles over the pit and RM1872 deputising for RM2106 work this weekend was mainly cosmetic though the effects have been dramatic.
The internal illuminated advert has now been rebuilt with new components made to the original drawings. All the holes lined up and the removable panel fitted first time; most satisfying. Now all we need is the advert....
 |
|
| Internal advert assembled and fitted | Photo © GRB 2007 |
We also changed the sidelight fitting screws to stainless steel ones that had been machined and polished specially because the original brass ones had been so sanded the chrome plating was missing. All six screws are now present and look very tidy.
Sometime back we borrowed a radiator badge trim triangle from RM16 so we could make a replica. The easiest way to do this was to make up the tooling which started as a piece of 16mm steel plate plasma cut to shape. This was then ground to size and profile before mounting on a backplate for pressing. The experiment was to use a block of lead for the die and the final product is astonishing. An original LondonTransport badge can be seen fitted to RM1872 with our new triangle which we have had nickel plated so it's in keeping with the rest of the vehicle. Now we have the tooling we can make others so if you're interested please and we'll provide a quotation.
Whilst trying to fit the trim we found the wood in the back of the panel had rotted away. This was replaced and our battered trim reprofiled as best we could and polished up. The final result was worth the grief.
 |
|
| The tooling: RM16's original triangle, the punch, SDR triangle, lead die | The rotten wooden parts of the radiator grill are replaced |
 |
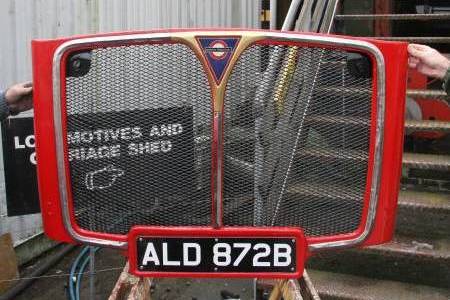 |
| The radiator grill surround is cleaned ready to refit the restored trim | Radiator grill ready to refit; note the as yet unplated SDR trim triangle |
 |
 |
| RM1872 with the SDR trim triangle...... | ....and with a genuine LT triangle; spot the difference. |
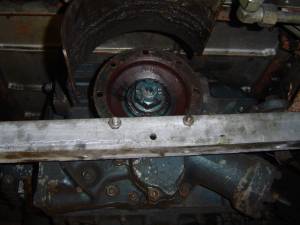
Friday April 13th saw RM1872 over the pit so the rear of the exhaust could be repaired by Nostalgic Transport and we could repair the gearbox on the Saturday. Unfortunately the week earlier whilst on a job the front pipe to the exhaust also failed so we had to repair this first. We have now acquired a replacement set of exhaust pipes for the original AEC portion (gearbox bulkhead backwards) which includes two flexibles and the silencer.
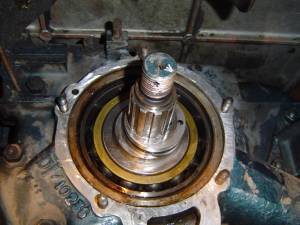
Compared to January above we stripped the gearbox back further by removing the 4th gear piston assembly and the cause of our rumble became very evident on removing the yoke; the ball race had disintegrated! All the balls were "oblate" and the whole lot fell out when the yoke was removed.
Fortunately we have a spare scrap gearbox (one of the planet trains has shed its needle rollers) in which the thrust bearings appear sound so we transferred the yoke from one to the other. In typical RM fashion though the two gearboxes are different internally. The scrap one has a different shaft so the nut is different and the clutch assembly is self contained unlike the one in RM1872. This meant we had to remove the yoke bearings from the clutch pressure plates so the good one could be fitted to RM1872's gearbox. The gearbox is very well designed and you only need a suitable pin punch to do this because there are two holes in the plate giving access to the bearing inner race.
Because the clutch in RM1872 doesn't have a retaining circlip it had to be assembled on the vehicle and the pressure plate jiggled round until the inner teeth engaged. Obviously with the cover missing the springs pushed the clutch apart again so final setting couldn't be done until the cover was refitted!
Due to damage we also replaced the drain plug so hopefully we can change oil in the future...
 |
 |
| Clutch assembly shewing release springs - note brake band in background | 4th gear thrust yoke with replacement bearing (drain plug since replaced) |
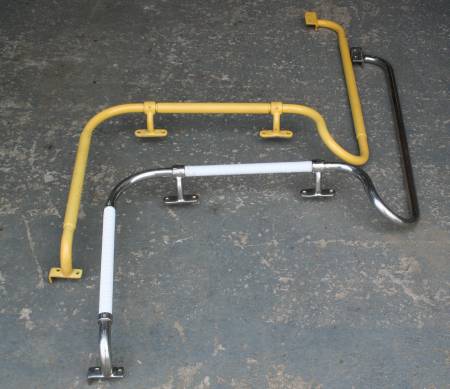
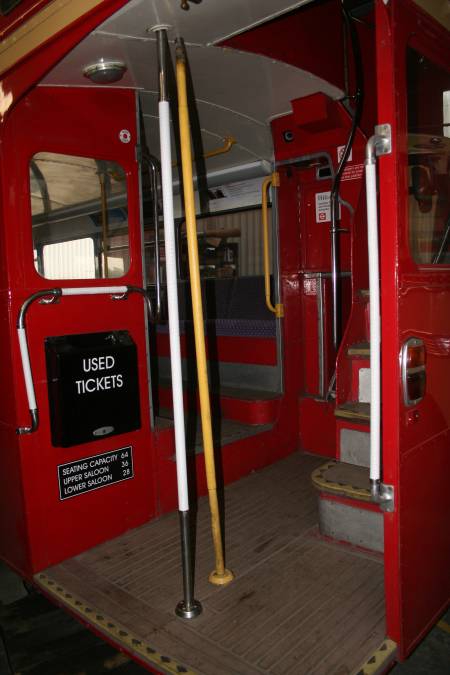
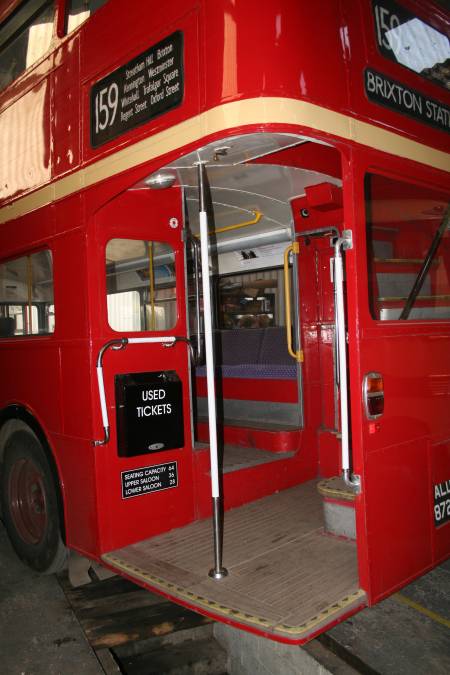
We also refitted the front wheel trims which were rechromed by Medway Buffers and Chrome and have new stainless steel fixing screws. Unfortunately the wheel nut studs are longer than the original AEC items so one of the trims was damaged which will be repaired in January 2008. Meanwhile up on the lower deck the monkey pole was removed along with the two external grab handles. These have been replaced with the original chrome style (instead of the awful yellow) and proper white "Doverite" tape. Fitting this is fun particularly since the two hand rails are smaller in diameter and the tape naturally tries to unwind itself!
Finding the retaining pins was also fun but we did. The monkey pole has five ¼" solid stainless steel rivets at the top and the rear bulkhead "loopy" handrail has two 3/16" solid rivets all of which are polished once finished to disguise them. We haven't done this yet because they need changing to new items so there's sufficient length to clean off and give a perfect finish. Another job for January 2008!
 |
 |
| Front grab handle centre rivets - solid 3/16" stainless steel polished over | Front grab handle end collar pop riveted through Doverite to secure both |
 |
 |
| Old Yellow grab handle and refurbished Doverite original version | Monkey Pole top fixing - 5 off ¼" solid stainless steel rivet polished over |
 |
 |
| Yellow and refurbished Doverite Monkey pole - still some handles inside the 'bus to change | Refurbished handles stand out better and have better grip - the giddy angle over pit is to give access to the underneath of the monkey pole |
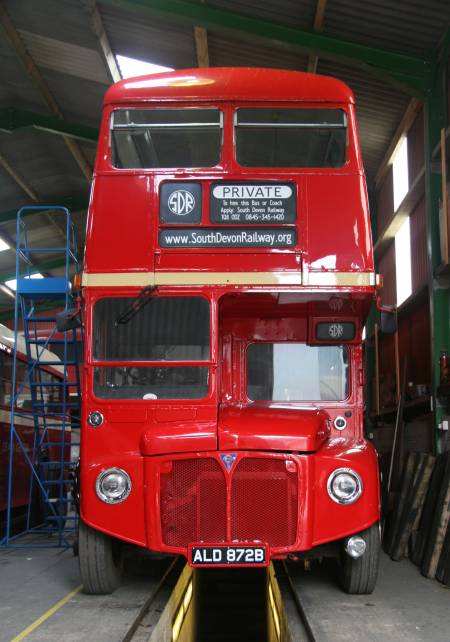
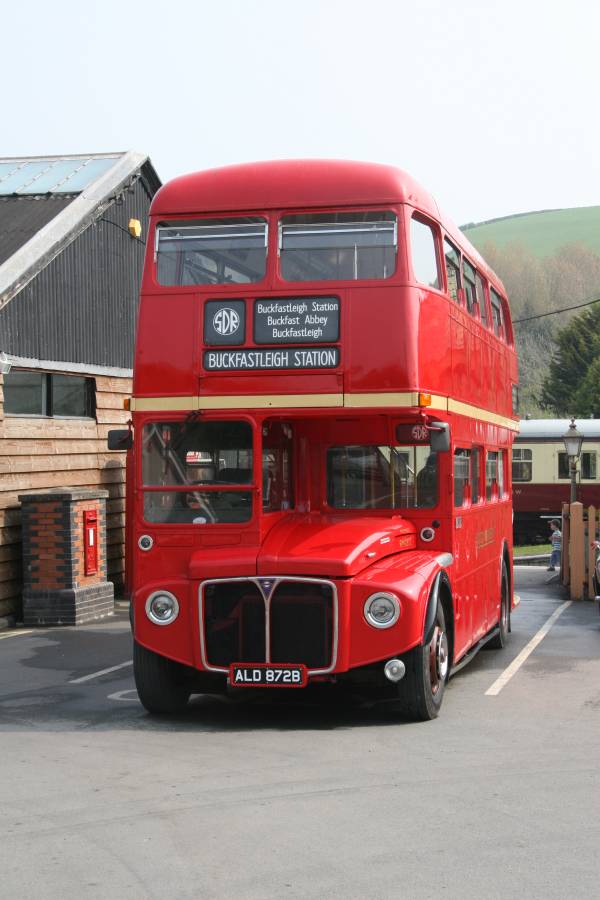 |
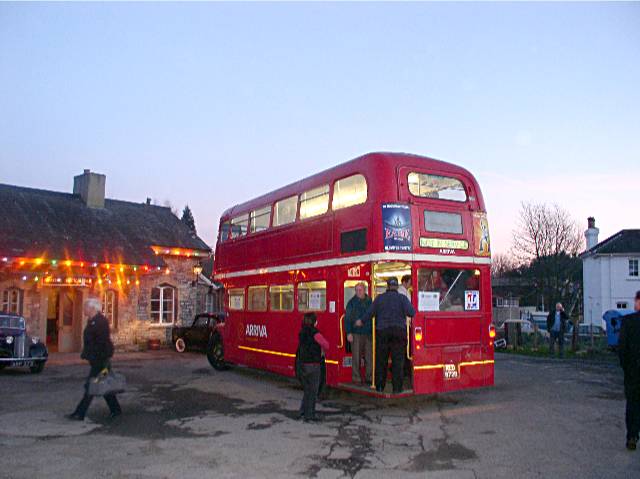
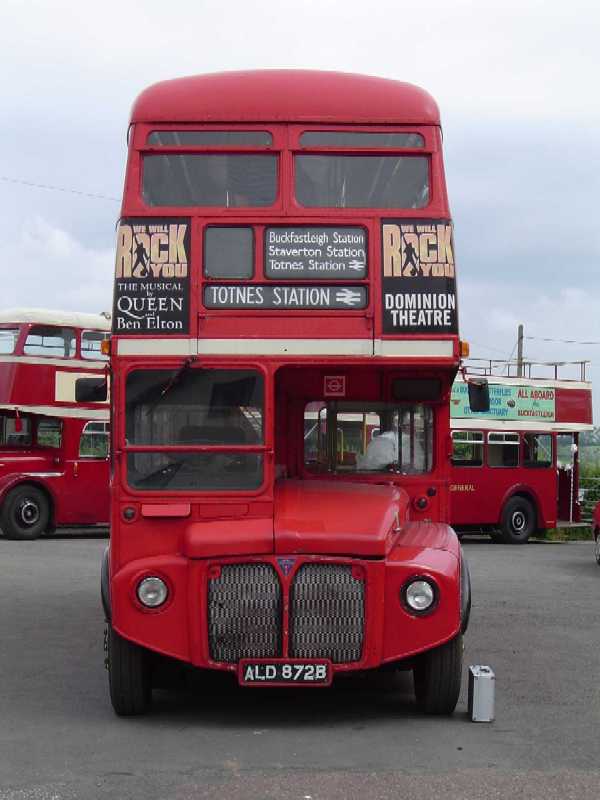
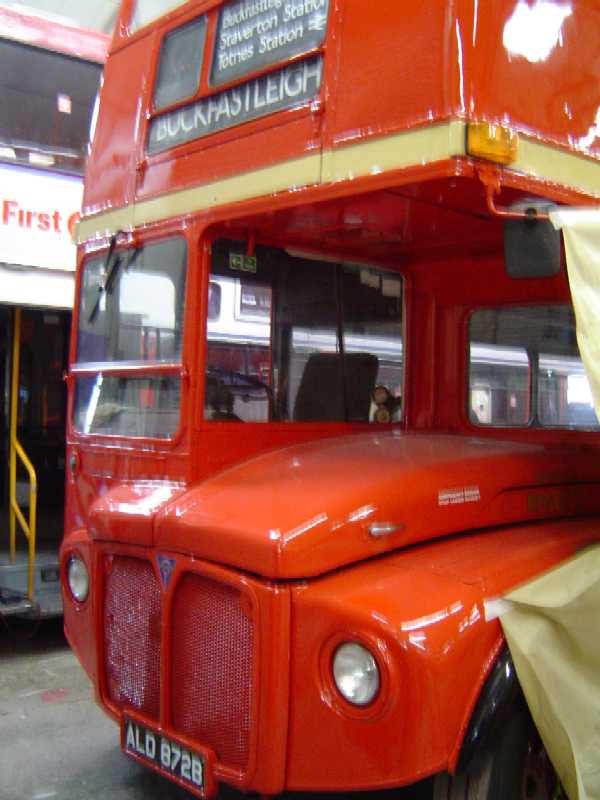
| RM1872 at Buckfastleigh Station on Monday 16th April doing the SDR |
Progress report July 2007
Due to inclement weather the opportunity was taken to remove more yellow handles. We had managed to acquire the conductor's handle which saved us trying to restore this one with its welded on grip.
The longitudinal handles over the wheel box bench seats on the other hand were stripped of their yellow coating to reveal a grit blasted finish which we need to polish out. An initial effort was made by hand with emery tape but we'll have to get out the polishing mops to complete the job to mirror finish. We have removed the pitting and the handles look better but are not yet perfect. We are now reduced to just four yellow handles so we're nearly there. Since the remaining handles are simply straight tubes with the seat end expanded we don't know if it's going to be quicker to make new seat grab handles or polish up the ones we've got. We'll find out when we try to clean up the first handle.
 |
| Handle stripped of yellow nylon awaiting cleaning |
 |
| Initial cleaning and polishing with emery tape (a slow dirty job !). |
We've also been struggling to check and maintain the pressures in the rear inner wheels because the valves are effectively too short. We spoke to Arriva London and found that they use plastic valve extensions so we got a pair. These are just plastic tubes with a rod in the middle so the original Schrader valve is still doing the sealing. Tyre maintenance is now much easier !
 |
| The plastic tyre valve extension |
Whilst on a recent charter the Routemaster came to Buckfastleigh and so we took the opportunity to add the London Transport operator details to the nearside as shewn in the following picture.
 |
| Note the "Operator" address details on nearside |
Progress report January 2008
On the 26th January 2008 we had our Annual Association Dinner for which the Routemaster was used to collect 29 participants and then return them home. This meant we had time to do a few little jobs such as re-rubber the destination blind glasses.
Below are details of changing the rubber which is good fun! It can be helpful at the front to have a second person push the rubber lip out over the glass so it is fitted quicker. They can also support the corners when fitting the lace to stop the rubber rolling inwards. We used the PSV plastic spatulars throughout to prevent damage to the rubber or glass.
The rubber is IRS 0772 W/S and the lace SF 1 B from C.O.H.Baines of Royal Tunbridge Wells, Kent (about 15metre are required to do all the blind boxes).
|
| The old rubber is cut away to release the glass |

|
| The glass is carefully removed for re-use |
|
| The new rubber is fitted to the 'bus first then the glass from outside |
|
| Finally the lace is fitted to lock everything into place.Plenty of
lubricant needed
Note the lace stretches so needs to be worked back to stop it "shrinking". |
We also managed to remove that awful yellow from the grab handles though we still need to polish them back to a mirror finish.
 |
| The yellow finish is removed with a coarse polishing disk |
 |
| Before and after; note anti rattle tape on right hand end of pole |
 |
| The last time the poles were yellow was the previous night! |
 |
| All those ghastly yellow handles have gone... |
March 2009
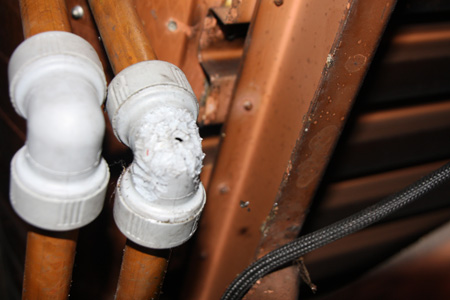
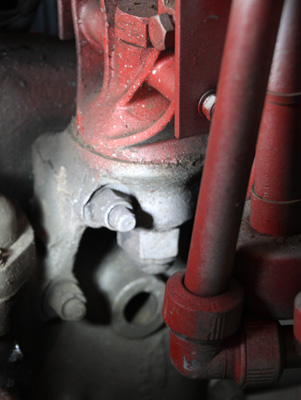
When we last used RM1872 it was observed that water was leaking from the canopy down the nearside mirror but it wasn't raining!
Further investigation shewed this to be coolant and there were complaints the heating wasn't working so the circuit was isolated for further investigation.
All manner of scenarios went through our minds but reality has a great habit of catching one out and there is no way we'd have predicted the fault: rodent damage!
As can be seen from the picture below a mouse chose to knaw its way through a plastic heating pipe causing the leak. Given where the pipe is and the total lack of other rodent evidence we have no idea when this actually occured. The remedy was simple; fit a new elbow. This time we've used a copper one. The disadvantage of the copper elbow we've used is that it needs a tool to remove it next time but hopefully we won't need to.
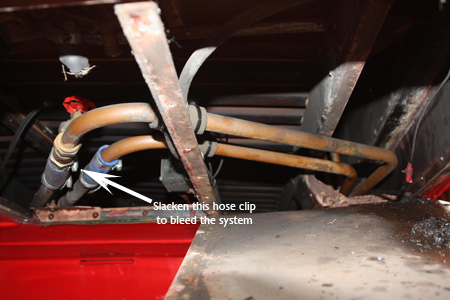
For those interested in this fault and how to bleed the system here are a few notes:
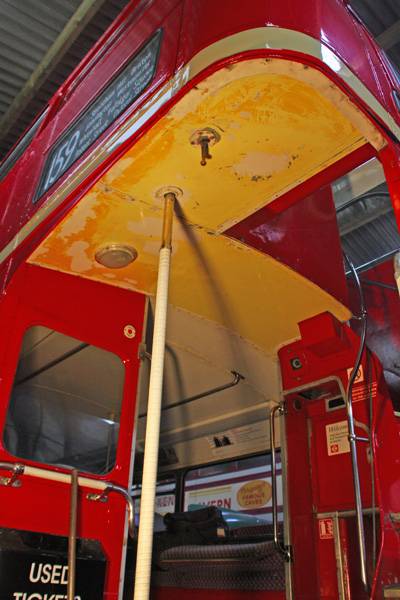
The canopy finisher is in three pieces all held up by the standard body screws; the flap, the ribbed main panel and a flat side panel. It was this panel we had to remove to get at the heating pipes. Unfortunately in our case the grab handle screws had siezed and we didn't have an impact driver to hand so we worked around the problem by removing the blind box which is only held on by four bolts. We were then able to bow the plate sufficiently to get in.
As can be seen we removed the wing and bonnet to give us more space to work and to save damaging the panels (HINT: put ¼" bolts through the bonnet springs to ease removal and refit of the bonnet).
Bleading the system is interesting but simple. Slacken the hose clip next to the stop valve behind the canopy flap and then start the engine. With the enging running at a fast tick over the water pump will push water up to the canopy and the air will bleed out of the return pipe hose connection. When it stops blowing bubbles retighten the hose clip. RM1872 has two stop valves to save draining the coolant when the engine is repaired or to isolate the heating in the summer - one, in the return, behind the canopy flap and one, in the feed, under the bonnet behind the engine.
 |
| Our canopy water leak and no heating is explained - rodent damage! |
 |
| With the canopy trim dropped the heater pipes are accessible. |
 |
| It's easier to remove the wing and bonnet to gain access. |
Whilst we were working on RM1872 we took the opportunity to check the "A" frame securing bolts. For this a special 1½"AF "crow's foot" spanner is needed; see picture.
 |
| The LT "Crow's Foot" spanner for the body bolts |
 |
| The nearside body to "A" frame mounting bolt. |
January 2010
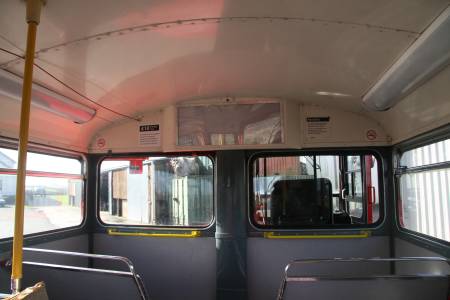
Since returning RM1872 to service we have spent some time cleaning the inside and attending to the upholstery. One of the things that has become noticable is that the ceilings needed cleaning and, on the lower deck, the paint needed repairing due to a compatibility issue between various previous paints causing starring around the rib rivets.
On the platform the paint had started to peel and it was possible to remove the earlier layers in A4 size slices!
For this reason we cleaned the ceiling and then repainted it. We'll see how long this lasts..
 |
| The platform ceiling after removal of loose paint |
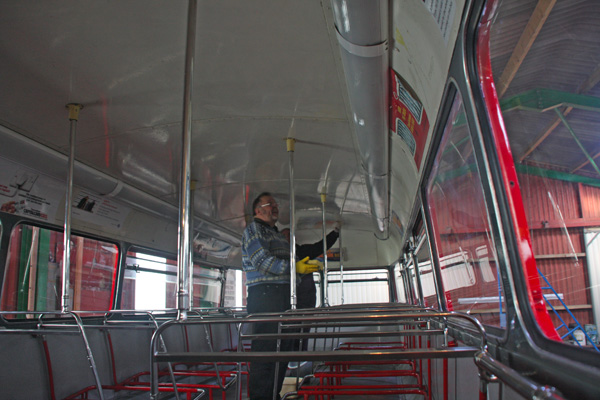 |
| Cleaning the upper deck ceiling |
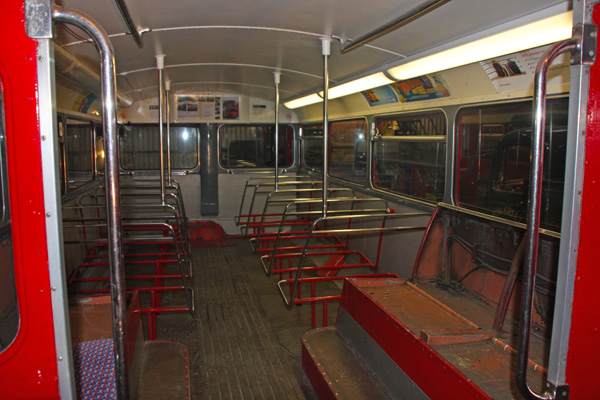 |
| Lower deck after repainting the ceiling |
January 2011
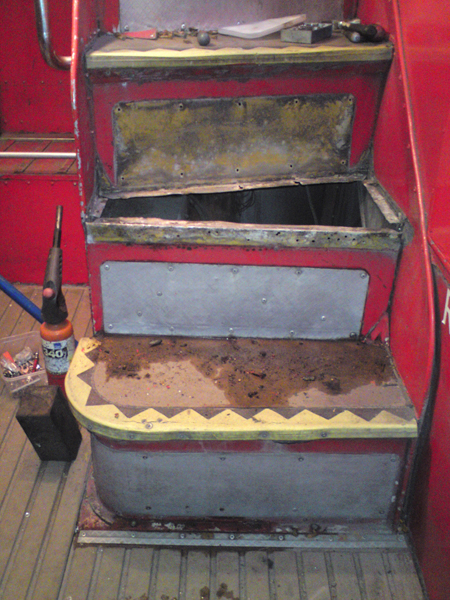
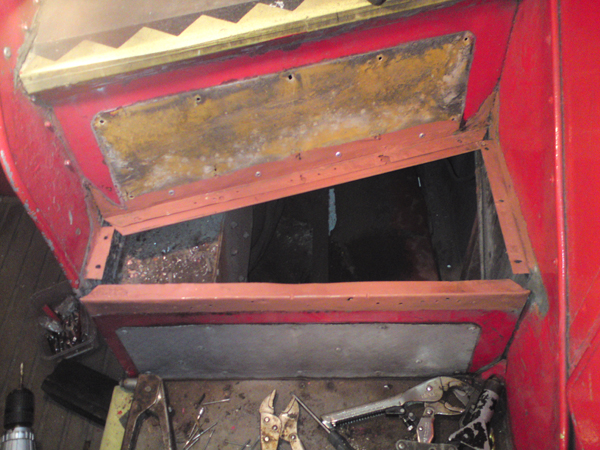
During the final months of 2010 it was reported that one of the treads in the staircase had more give it than one would expect. This was inspected and passed as safe but in need of further attention during the closed season.
During our annual repair visit we therefore set to and repaired the tread and pictures of this work follow. Basically the riser rivets had failed following a crash some time before we got RM1872 and the wooden tread could no longer take the full weight without deflecting.
The rivets have now been replaced along with the worn out tread.
In an ideal world one would remove the tread finish, undo the screws, fix whatever's wrong and screw back a new tread from stores and refinish but we didn't have that luxury!
We VERY carefully removed the "dragon's teeth" nosing and then the tread surface (use a heat gun to gently warm these up making removal easier). We found that the elements had caused the spire nuts to react with the aluminium in a couple of places and so we needed to reinforce the lower edge of the upper riser.
The wooden trim on the top of the preceding riser also needed to be replaced due to deterioration from one too many "quick fixes".
A new tread was cut from 13mm plywood, the fixing holes drilled and counter bored for the new retaining bolts and then painted.
New spire nuts were fitted to the edge supports and a new ash front trim was fashioned and fitted to the top of the lower riser. We removed a large pile of "quick fix" screws in this process.
The tread finish was then stuck back into place as was the "Dragon's teeth" nosing.
The edges of the step were sealed to prevent water ingress and finally the area was repainted to complete the job.
 |
| The affected area with faulty tread removed |
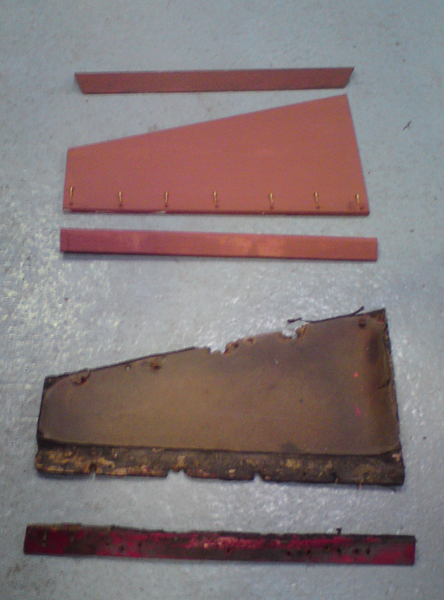 |
| New and old tread components. |
 |
| Stair tread after repair and priming. |
 |
| New tread fitted into place |
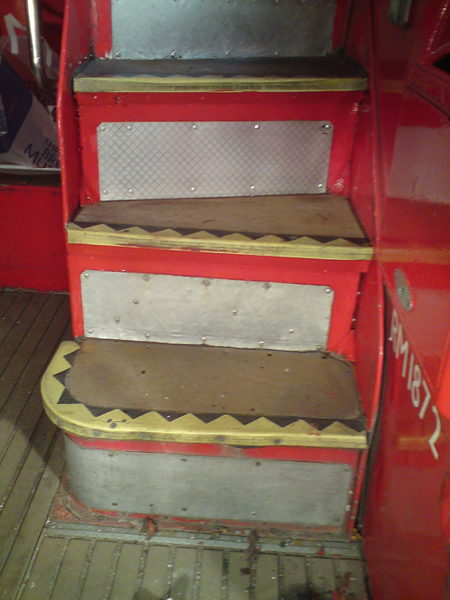 |
| The new tread in place and fully finished complete with new kick plate |
January 2012
It has always been our intention to return the exterior to as near its original condition as possible so during 2011 we sourced a pair of CAV front traficators which we have now fitted.
The picture below shews one of the units fitted temporarily to the offside and in need of painting.
For details of what’s involved please read our dedicated page.
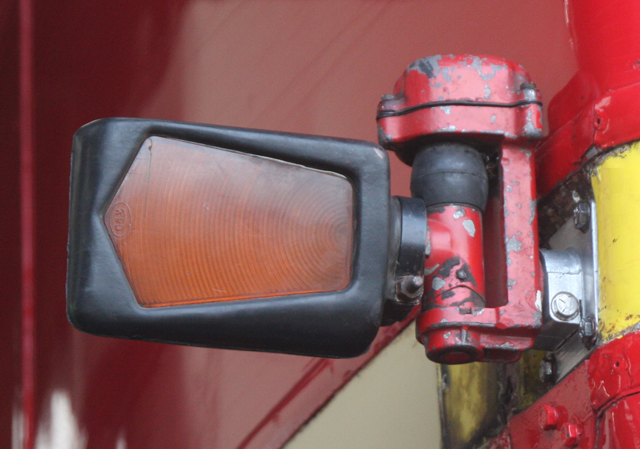 |
| The original standard CAV indicator - note new baseplate |
© South Devon Railway Trust (RM1872) 2005-20 |  |